This post will be the first in a series on outdoor cooking techniques. I've been camping for over two decades and I have found that the majority of people really limit themselves in how they enjoy the outdoors and food is one notable area. As mentioned in the "Outdoors: Fire" post, my Boy Scout Troop (Troop 115: Scheoneck, PA) had a strong outdoor tradition, and the outdoors has became a tremendous source of serenity for me.
One particular tradition of Troop 115 was outdoor cooking, the mantra of the leaders was "anything you can cook indoors, we can cook outdoors," and I'm really looking forward to sharing more of the methods I've learned from them.
Perhaps the most challenging of all the cooking conditions is backpacking. When backpacking size, weight, and refrigeration are all working against you.
Food Options
Backpacker Meals: Perhaps the most basic and rudimentary option is the bagged backpacker meal. These are the meals you find at your favorite outdoor outfitter and they are basically: add hot water, wait, eat. The advantage is that they are quick, easy, and can refuel you. The disadvantage is that you sacrifice taste.
MRE (Meal Ready to Eat, aka K-rations): These are the ration packs the military use in the field. They contain more variety than backpacker meals; each MRE contains a main dish, side, a snack (of some form), and a desert. They also contain an "accessory" kit which contains random essential items. As military personnel will tell you, you won't like eating them for any long period of time.
Your Grocery Store: This is my preferred option. One thing to consider is that you won't know how the backpacker meal or MRE will impact your digestive system. Everyone is different, and cramps and diarrhea just make backpacking unbearable. Instead stay with what you know and have fun with it. In your grocery store, everything not in the freezer or refrigerator section is fair game. And for the weekend trip, many of the normal food preservation rules can be bent.
- Produce: Many backpackers like tried foods. I believe it's because they believe it's lighter. However, you sacrifice taste, nutrients, and water which you have to drink more water to make up for. Dried fruits can be fun, but an apple can be very refreshing.
- Favorite: Shepherd Book's Tomato Salad Tribute. I'm a Firefly fan (Browncoat) and if you haven't watched the series you should. In the pilot episode, Shepherd Book makes for the crew a basic salad of tomatoes and seasoning. I have no idea what he puts in his salad, but I've packed in some cherry tomatoes, vegetable oil, salt, pepper, and oregano. I have a small seasoning kit for backpacking where I can store a small amount of oil and the seasonings. I carried the tomatoes in a plastic container. Then after a long day of hiking, I could whip up this quick appetizer and get some food energy and refreshment while I prepared dinner.
- Boxed foods: Pretty much anything in the aisles is fair game. However, pay attention to how the food needs to be prepared and what additional ingredients are needed. If something requires dairy, look for substitutes. The current uprising of food allergies has put many great products out there that are more digestible than powdered milk or powdered eggs. Be creative and lower your expectations. On one trip our group made Marconi and Cheese and substituted water for the milk. It is not a one for one mix; we basically added water until we got the consistency we wanted. It wasn't 100% like home, but after 4 days in the Adirondacks, it was tasty.
- Canned foods: Over the last two decades the variety of canned and packaged meats have grown. They are no where near fresh meats, but they are something you can work with.
- Favorite: Shrimp Scampi: While raiding my local store for an upcoming trip I found canned shrimp and thought I could do a shrimp scampi. So after a long day on the trail, I cooked the pasta. Then drained the water and threw the shrimp and seasonings in. The seasonings were a mix of vegetable oil, pepper flakes, and a little lemon juice I put in another part of my seasoning kit.
- Favorite (sort of): BBQ Chicken and Teriyaki Noodles: I had also found in the store packaged barbecue chicken. On the trail I heated it up on my burner and made up some packaged Teriyaki Noodles. The chicken wasn't great, but I'm willing to explore other brands.
- Cold Foods: As mentioned above, some "rules" can be bent. Keeping food cold on a backpacking trip can be a heavy endeavor and impossible if the trip lasts for more than a day. NOTE: This section is a "you are on your own here." I'm offering some ideas, but you need to make your own health decisions. There are multiple factors that can effect the safety of your food and those are your responsibility.
- Foods eaten within the first few hours of the trip: I've had success at freezing foods that needed to be kept cold and that I was planning on eating the first night. Specifically, I had taken some ready to bake dinner rolls and had frozen them. We started out and 4 hours later we were making camp. They had already thawed, and I was ready to bake them (I'll talk more about how below).
- I've really debated on pushing the envelope more than I have above. On one hand we are overly cautious about how we handle food, and on the other, that is one of the main reasons we don't have many of the food related illness issues that crop up across the globe. So let me leave it with, you are on your own, but there are situations where foods we normally expect to be refrigerated could be safe without it. But, that is between you and your body.
Cooking Options
Cooking Systems: I can say "back in my day" (which was over 15 years ago) these cooking systems weren't wide spread. I'm referring to the pot and burner as one unit like you find with Jetboil or other brands. If you aren't familiar with them, it's like having a large cup with it's own built in heater. It can boil water pretty quick. It is compact, light, and limits your options to pretty much boiling. Now, for the creative there is a lot you can do with boiling. On one trek a friend made fresh dumplings in her Jetboil.
Burners: There are a wide range of backpacking burners out there. The most common and popular you can find by asking about "cooking systems" at your favorite outfitter. "In my day," it was mainly Coleman fuel or propane. I currently carry a small propane burner. I take flack from my friends because it's bulkier and heavier than their "cooking system," however where most of them can only boil water, I can also pan fry. Coleman fuel was the preferred method. Propane is criticized because it can fail in cold temperatures and there can be issues with the check valve. However, I've found that if you don't maintain your Coleman stove (or lend it out) it's more likely you'll be stuck with no heat source at all.
Fire: Check with the rules and regulations where you are camping and if they permit camp fires, this is by far the best. It is light (not much to carry), gives you a variety of cooking options (boiling, pan frying, baking), provides bodily warmth, and is an excellent morale booster. I plan to write a more detailed article on fire cooking including dutch ovens. In this section, since it is about backpacking, I would like to include a section on aluminum foil cooking. Aluminum foil is light weight and versatile. Here are two methods for foil cooking, which ever one you use, remember to use the Heavy Duty foil.
- Foil wrap: This method is basically a heating (or reheating) method where you place the food on the foil and enclose it within the foil. Move some of the coals to the edge of the fire or a separate area (do not put the package on the fire, you'll burn your food). Then you can place coals on top or flip the package from time to time (or both). Change the coals as they burn out and keep an eye on the food. My roomate's number one piece of advice for avoiding burnt food: "keep an eye on it."
- Reflector oven: This was the method I used at Roger's Ledge to bake the dinner rolls mentioned above (I think they were biscuits). Now many places sell kits to help with the angles, however you can accomplish the same with some wire and some foil. I built my "oven" by taking a wire clothes hanger and bending it into a 3-sided square (so one side of the square was missing). Next I picked my area; it should be ground level or a little elevated from the fire. The goal is to catch the heat radiating out and reflect it down onto your food. I, then, created a lean-to with the foil and the coat hanger. The coat hanger was driven into the ground by the fire and the opening of the lean-to faced the fire. Then I slid my food in. A plate or tray made of foil is helpful so you can pull the food out and check it without upsetting your very hot oven. The Boy Scout handbook (and other sites) contains a way you can determine the temperature at the cook site by how long you can hold your hand there. I use this to adjust the geometry of my oven or relocate it if necessary.
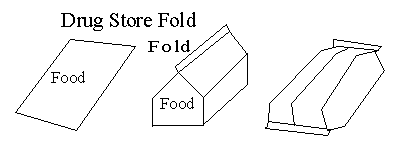 |
| From: usscouts.org |
If you've found this helpful or it gave you an idea, please post comments.
No comments:
Post a Comment